The ACF Articles custom field is your go-to Joomla solution for effortlessly connecting and organizing articles on your website. Featuring two modes – Manual Selection and Automatic Discovery – this custom field offers flexible solutions to cater to your content relationship needs.
In Manual Selection mode, easily curate article connections by handpicking specific articles when editing an article, utilizing a straightforward dropdown interface for seamless association. On the other hand, Automatic Discovery mode takes a dynamic approach, generating a list of interconnected articles. It identifies related articles by checking if the current article is linked to other ACF Articles fields that use the Manual Selection option. Utilize various filtering options, such as categories, tags, authors, and status, to tailor your displayed articles.
TABLE OF CONTENTS
Requirements
To use the Articles field, there are a few requirements that must be met, listed below:
- If you'd like to use the Automatic Discovery option, you must have the Pro version installed. You can easily upgrade to Pro if you're currently in the Free version
Setting up Articles Field
To start using the Articles Field, create a new custom field and select ACF - Articles.
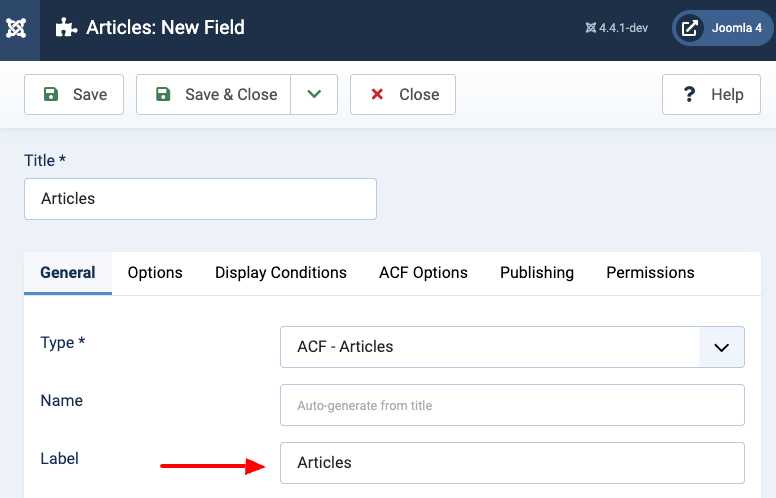
Once you have selected the ACF - Articles Field, you will be presented with all available options to configure the custom field.
General
Connection Options
Select how the articles will be displayed.
Manual Selection: Choose specific articles manually.
Automatically: Automatically identify related articles by checking if the current article is linked to other ACF Articles fields that use the Manual Selection option.
Note: By default, you must enable this custom field on each article. To automatically make all articles display the linked articles, set the Default Value to 1/true.
Order
Select how to order the items
Automatic Discovery
ACF - Articles fields
To automatically find articles, select at least one ACF - Articles field, and the current article must be linked to the selected ACF - Articles fields.
Limit Articles
Define how many linked articles to display. Enter 0 for no limit.
Input Options
Minimum Articles
Sets a limit on the minimum number of articles that can be selected.
Maximum Articles
Sets a limit on the maximum number of articles that can be selected.
Input/Output Filters
By Category
Set whether to filter the articles by category, select the categories, and whether to include child items.
Select either No to not select child categories, Yes to also select child categories or Only to only select child categories.
By Tag
Set whether to filter the articles by tags, and select the tags
By Author
Set whether to filter the articles by authors and select the authors
By Status
Set whether to filter the articles by their status, and select the status.
Layout
Layout
Select which layout to use to display the selected articles.
Available layouts:
- List: Show the selected articles in a list.
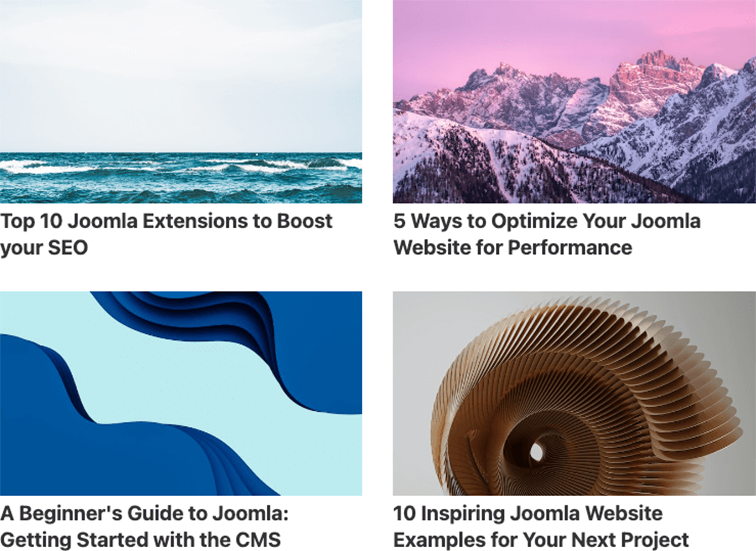
- Style A: Show the selected articles in a grid by displaying the article image and title.
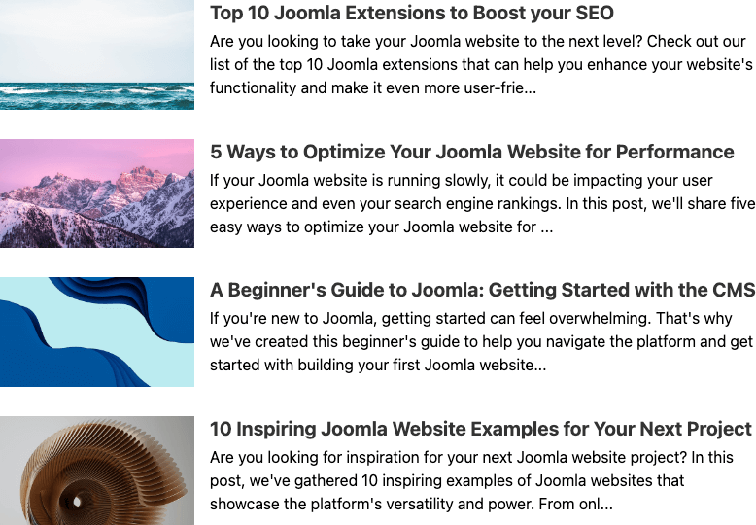
- Style B: Show the selected articles in a grid by displaying the article image and, next to it, the title and intro text.
- Custom: Write HTML and use Smart Tags to display your desired articles.
Columns
Set the columns for styles Style A and Style B.
Gap
Set the gap between articles for styles Style A and Style B.
Custom Layout
Enter the custom layout for each article item. You can enter any HTML code and Smart Tags you desire.
You may use the {acf.article.KEY} Smart Tag to get any article data. Below, you can find some more widely used properties:
- {acf.articles.index}: The index of the article.
- {acf.articles.total}: The number of total articles to show.
- {acf.article.field.KEY}: Display a custom field value. Where KEY is the custom field > Name value.
- {acf.article.id}: The ID of the article.
- {acf.article.title}: The title of the article.
- {acf.article.alias}: The alias of the article.
- {acf.article.link}: The link to the article.
- {acf.article.introtext}: The intro text of the article.
- {acf.article.fulltext}: The full text of the article.
- {acf.article.created}: The created date of the article.
- {acf.article.modified}: The date the article was last modified.
- {acf.article.images.image_intro}: The intro image of the article.
- {acf.article.images.image_fulltext}: The full image of the article.
You may also use the Smart Tag {article.KEY} besides the above Smart Tags to fetch data from the current article that the field appears in. The data you can retrieve are similar to the above, apart from the index and total keys.
This setting also supports Smart Tags, which allows you to define a dynamic approach to storing the uploaded files, such as using dates, current item (article, contact, user, etc...) information, and more! You can read more here: Using Smart Tags in Tassos Extensions
Conditional Logic
Using Conditional logic, you can fine-tune when your custom field appears on your site, by specifying some criteria, such as when the user is viewing your site from a mobile device, whether they are viewing a specific page if Google referred them, and more! The possibilities are endless.
When editing a custom field, you can configure when your custom field will appear by going into the Display Conditions tab.
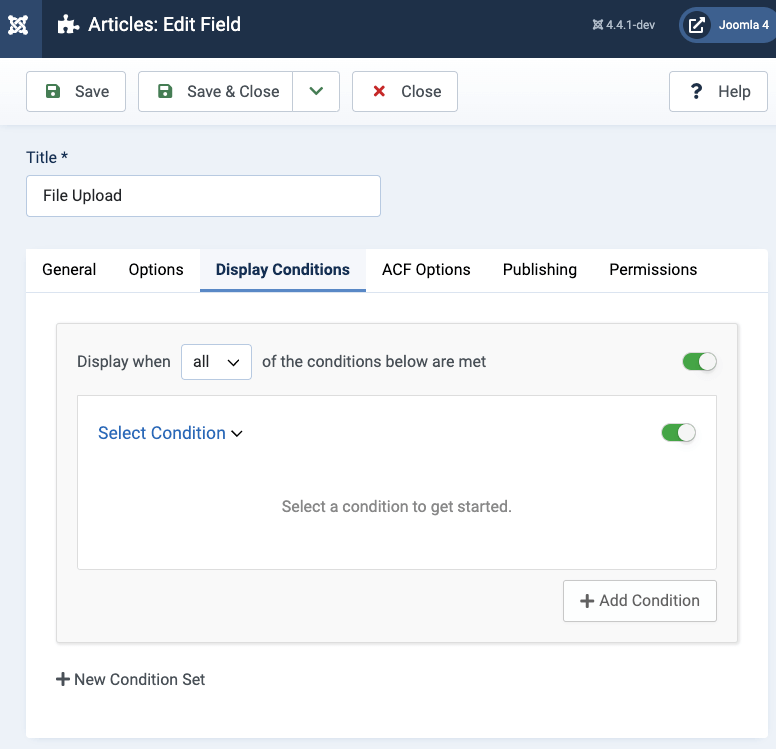
Once on the Display Conditions tab, you can configure when your custom field appears. Leaving the condition logic empty, tells Advanced Custom Fields to display the custom field site-wide.
Use Cases
The Articles Field can be used with any component that supports the Joomla! Fields such as the Articles (com_content), User (com_user), and the Contact (com_contact) component. Now that we've seen how to create an ACF - Articles custom field, let's see a few use cases.
How to add a Manual Articles Custom Field to Joomla! Articles
In this use case, we have a scenario where we already have a list of actors and movies and are interested in creating a movie directory site. So, we want to link each actor to the movie they have acted on. After we select the actor for each movie, we expect to see a list of actors appearing on each movie article page.
Step 1: Create a new Articles Field
Go to Content -> Fields, click New to create a new field. From the Type dropdown, select the ACF - Articles option.
Set the title of the custom field to Actors.
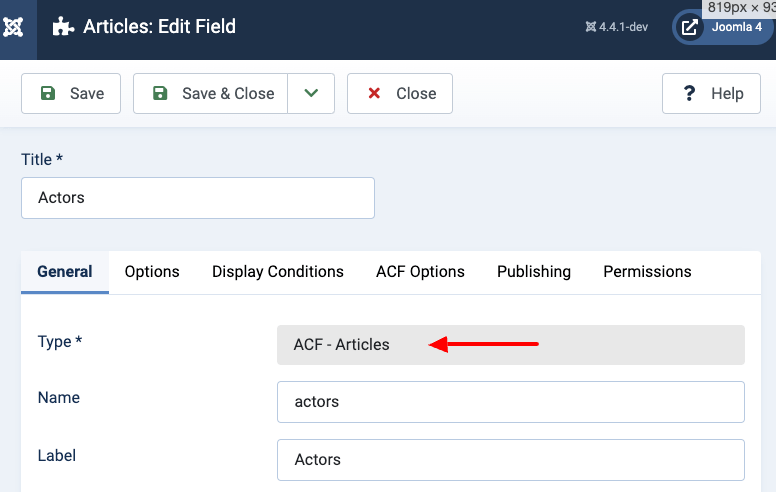
Click to save the field to return to the same page where, now, you can see a few new setting groups.
Step 2: Set how to connect the articles
Next, we want to set the ACF Articles custom field to let us choose the actors that will be linked on each movie, so under Connection Options, we select the Manual Selection option.

Step 3: Filter results
On this group, called Input Filters, we want to grab only the actors, so we select the Actors category. This helps us narrow down the available options in the dropdown, which we will use to select each actor, and not having to include unneeded articles.
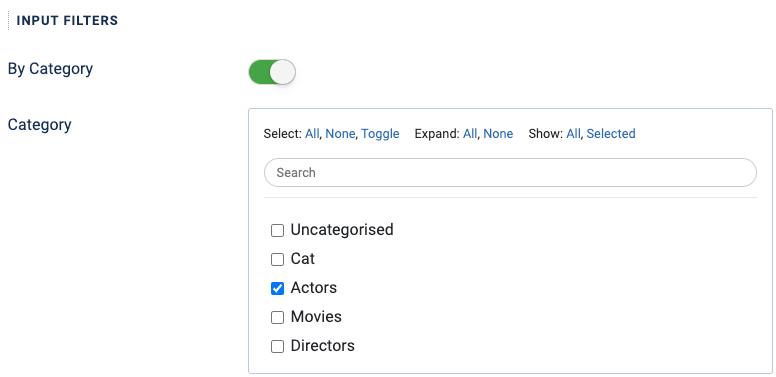
Save the field and proceed to the next step.
Step 4: Select the actors
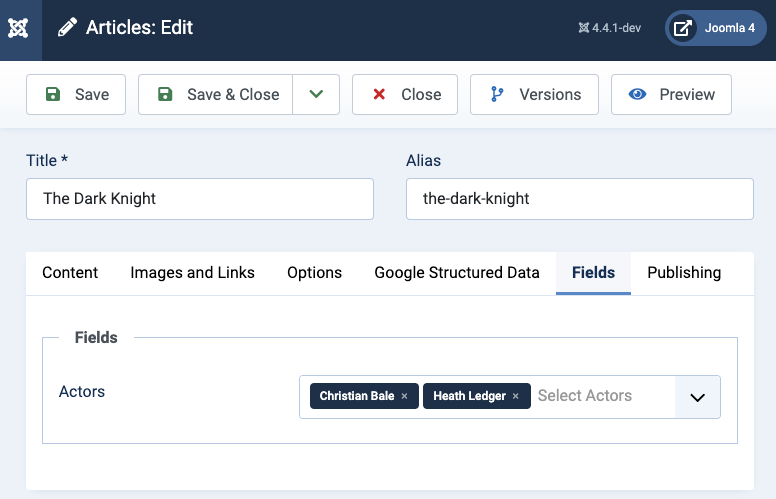
Once our custom field is ready, it's time to head back to our Movies articles, and select the actors for each of our movies.
So, head into each movie article editing page and select the actors for each movie.
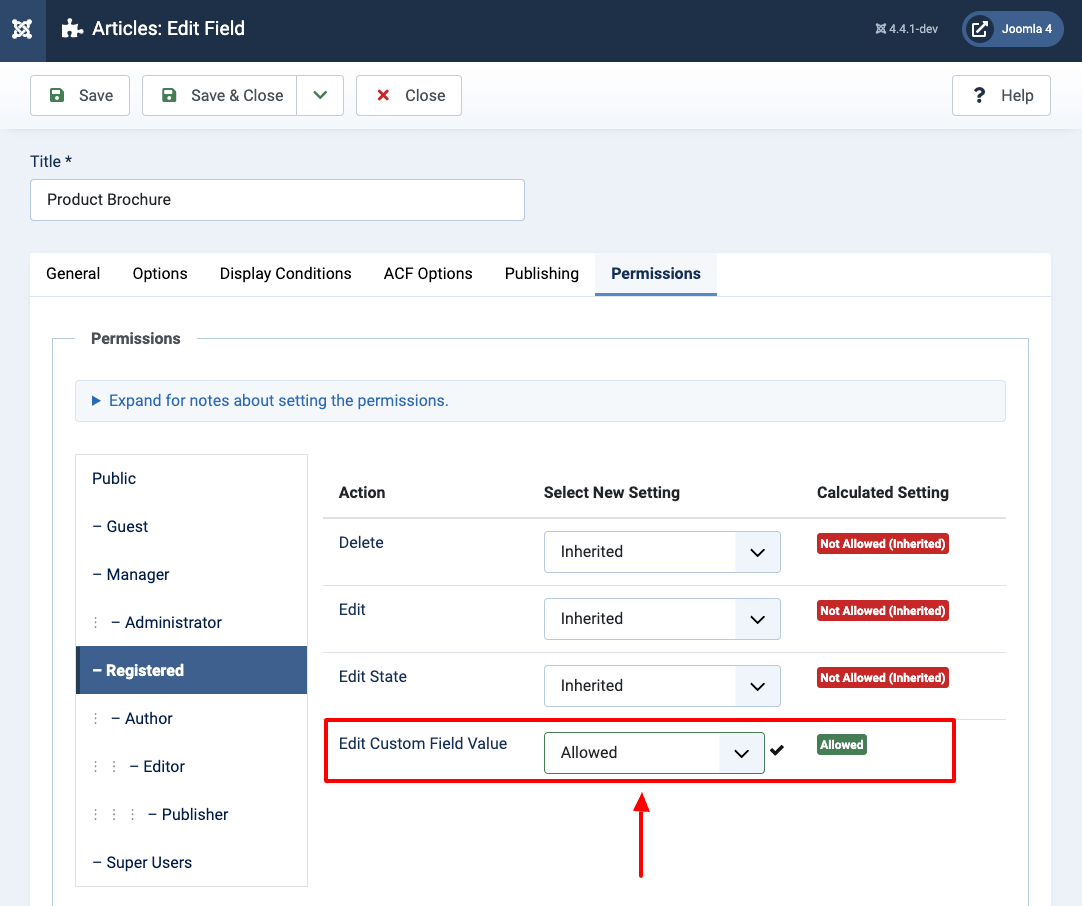
In case the field is displayed disabled in the form and you're not allowed to upload files, you probably don't have the right permissions to edit the content of the field. To fix it, you must set the Edit Custom Field Value option to Allowed in the Permissions tab in the Field settings as well as in the Users component configuration page.
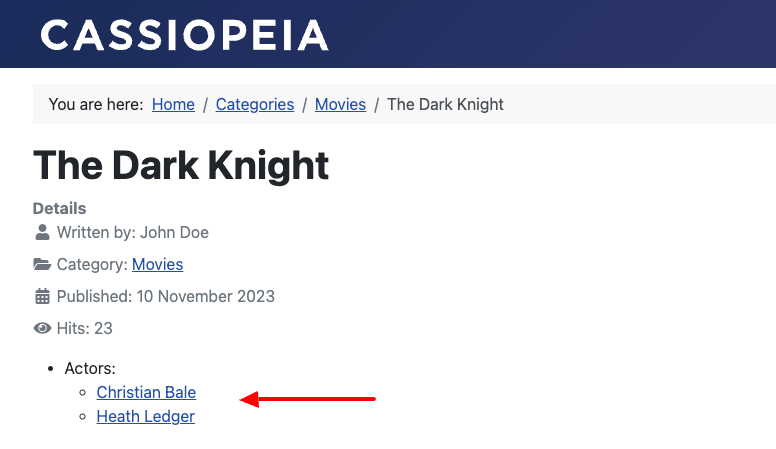
Step 5: View the selected actors
The last step is, once you have selected the actors, to save the article, and see all selected actors:
How to add an Automatic Articles Custom Field to Joomla! Articles
In this use case, we also have a scenario with some movies and actors we'd like to link. Let's assume that we have selected each actor in each movie so that when we view each movie article, we see a list of actors, letting us know who has played in each movie. The focus of this use case will let us view all the movies each actor has played in. Note that this use case requires the previous use case to be set up. Click here to follow that guide first.
Step 1: Create a new Articles custom field
Go to Content -> Fields, click New to create a new field. From the Type dropdown, select the ACF - Articles option.
Set the title of the custom field to Movies Played.
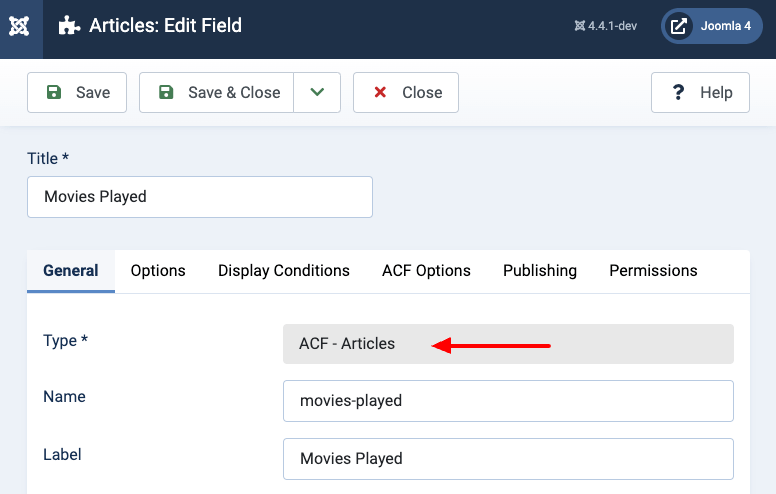
Click to save the field to return to the same page where, now, you can see a few new setting groups.
Step 2: Set how to connect the articles
Next, we want to set the ACF Articles custom field to let us automatically display all movies when viewing an actor article page, so we select the Automatic Discovery option under Connection Options.

Step 3: Set Automatic Discovery
Now, we must define which ACF Articles will be used when identifying the related articles. To find a related article, we check if the current article is linked to other ACF Articles fields that use the Manual Selection option.
Select the Actors ACF Articles custom field we created earlier under ACF - Articles fields.

Save the field and proceed to the next step.
Step 4: Enable the automatic articles field
Go into an actor article and enable the Movies Played ACF Articles custom field. This will now automatically display any articles linking to the current article.
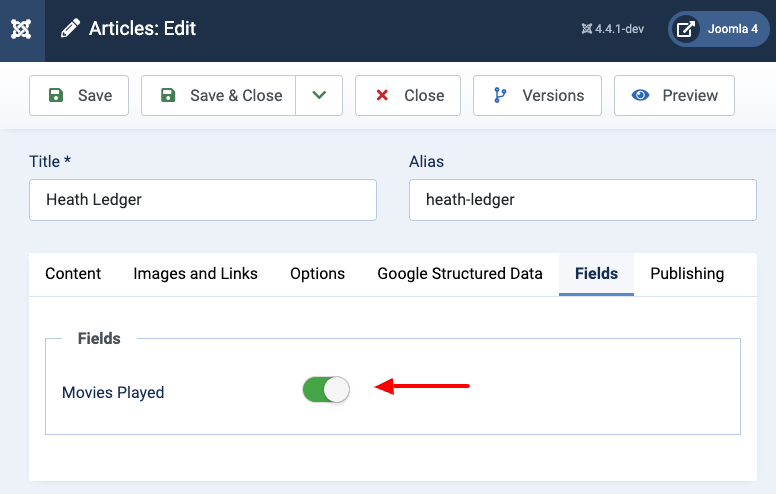
In case the field is displayed disabled in the form and you're not allowed to upload files, you probably don't have the right permissions to edit the content of the field. To fix it, you must set the Edit Custom Field Value option to Allowed in the Permissions tab in the Field settings as well as in the Users component configuration page.

Step 5: View the automatically linked actors
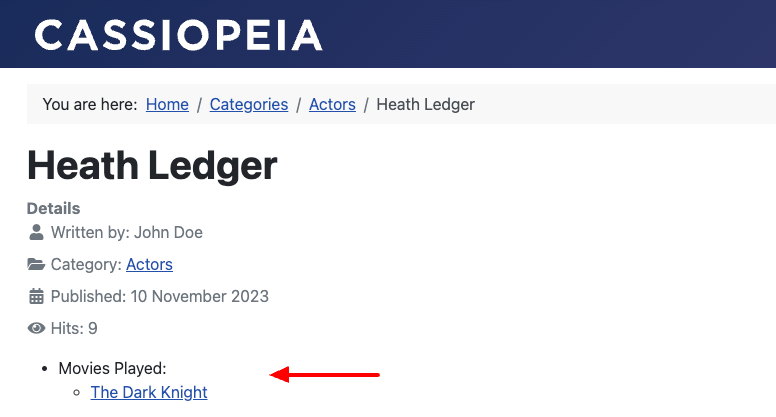
The last step, once you have enabled the toggle, is to save the article and see all linked movies of the actor:
Layouts
The ACF - Articles custom field provides different pre-made layouts. Below, you can see a preview of each layout.
List Layout
Displays all selected articles in a list.

Style A Layout
Displays all selected articles in a customized grid by including the article image and title.
Style B Layout
Displays all selected articles in a customized grid by including the article image, title, and excerpt.
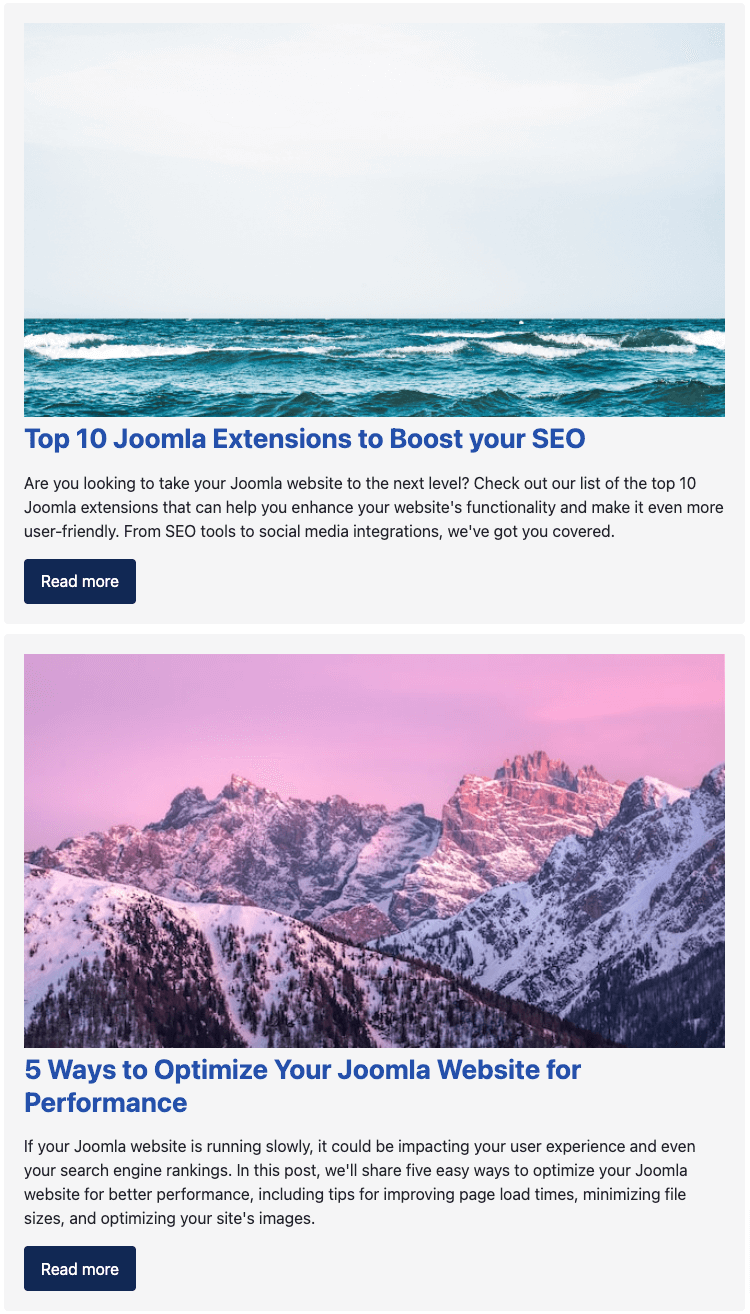
Custom Layout
Displays all selected articles based on custom HTML code.
Example custom layout:
<div style="background: #f5f5f5; padding: 20px; border-radius: 4px; margin-bottom: 10px;">
  <div>
    <img src="/{acf.article.images.image_intro}" />
  </div>
  <h3>
    <a href="/{acf.article.link}" class="display: block; margin-top: 5px; text-decoration: none;">{acf.article.title}</a>
  </h3>
  <p>
    {acf.article.introtext}...
  </p>
  <a href="/{acf.article.link}" class="btn btn-primary">Read more</a>
</div>
To-do list
Advanced Custom Fields is regularly updated with new features and bug fixes. The roadmap is quite packed with new features, and enhancements. Find out the upcoming new features by visiting the Roadmap page.
FAQ
How do custom fields appear in Smart Tags?


 Rated: