ACF Countdown - Add a Countdown Timer in Joomla
The "ACF - Countdown" custom field allows you to use countdown timers to create anticipation around upcoming events, creating the feeling of scarcity, anticipation, and drive more sales.
The Countdown Field comes built-in with pre-defined layouts that you can use to get started creating your countdown timers as well as provides a plethora of settings that you can use to fine-tune how your countdown timer looks, and feels.
How to add a Countdown Timer Custom Field to Joomla! Articles
The Countdown Field can be used with any component that supports the Joomla! Fields such as the Articles (com_content), User (com_user), and the Contact (com_contact) component. Let's see a real-world example of how content authors can add a Countdown Timer to a Joomla article and let website visitors know of an upcoming sale on the front end.
Step 1: Create a new Countdown Field
Go to Content -> Fields, and click New to create a new field. From the Type dropdown, select the "ACF - Countdown" option.
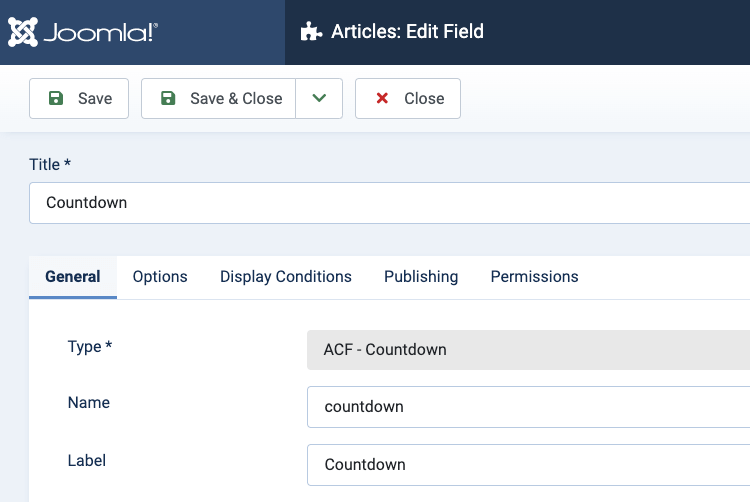
Click to save the field and return to the same page where now, you can see the field customization options.
Step 2: Select the Countdown Type
Under the "TIMER" group, you can define the Countdown Type, Timezone, as well as the action when the countdown expires. In our case, we have decided to use the "Fixed Date" type, use the Client's Timezone as well as hide the timer when it ends.

Step 3: Select the Countdown Template
Under the "TEMPLATE SELECTOR" group, you can select the Countdown template, either from a pre-defined list of templates or create your own using HTML and some helpful Smart Tags. In our case, we have selected the second template from the pre-defined templates.
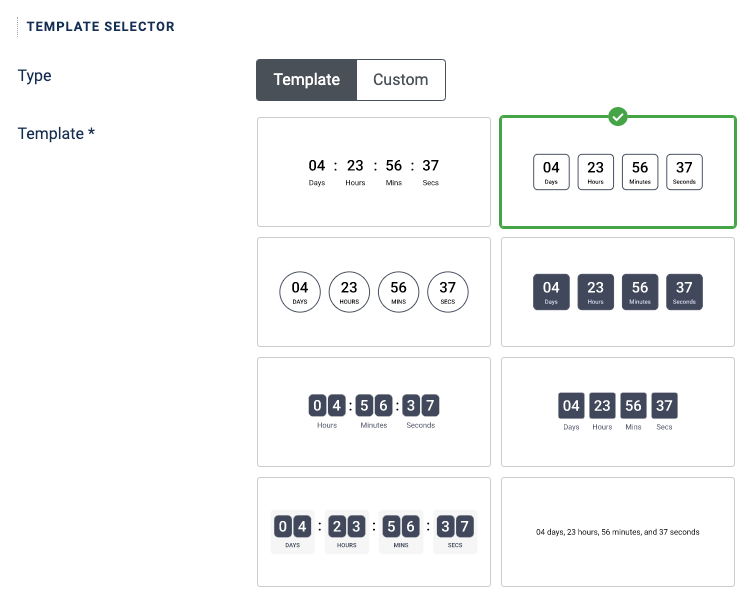
Step 4: Customize the Countdown Colors
At the bottom of the settings, you can find all color-related settings. You can customize the look of your countdown according to your site's design to make it look and feel as you desire.
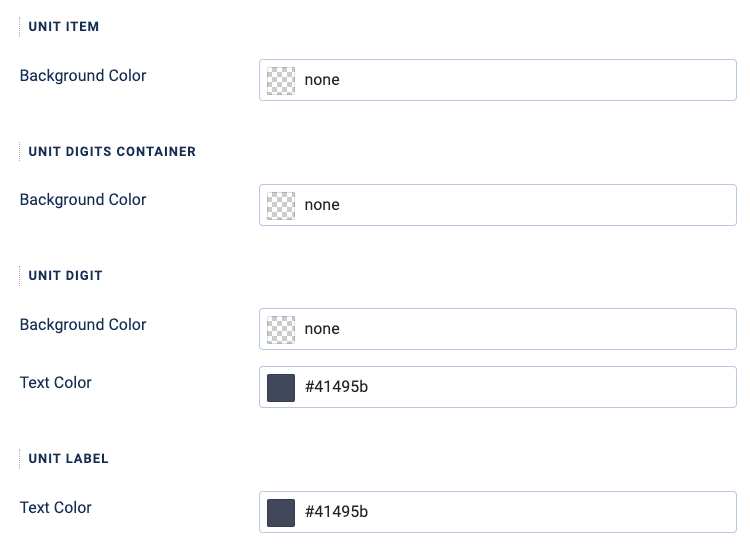
Step 5: Customize the Countdown Units (Optional)
Under the "UNIT DISPLAY" section, you can define which units to display (days, hours, minutes, and seconds). We let the selected template's default settings.
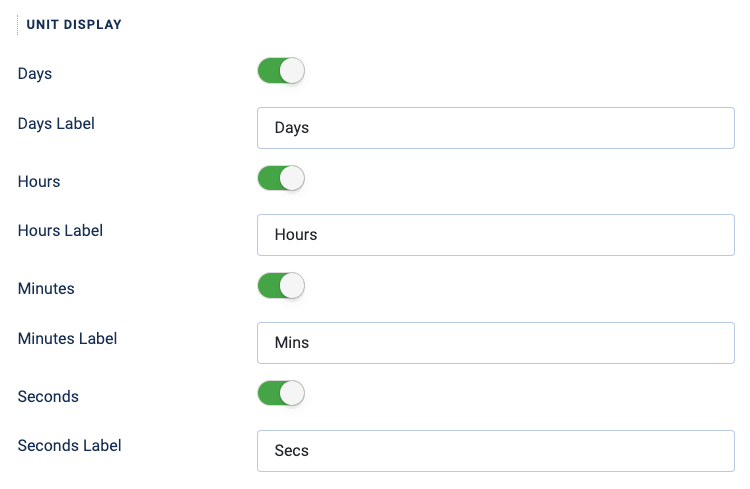
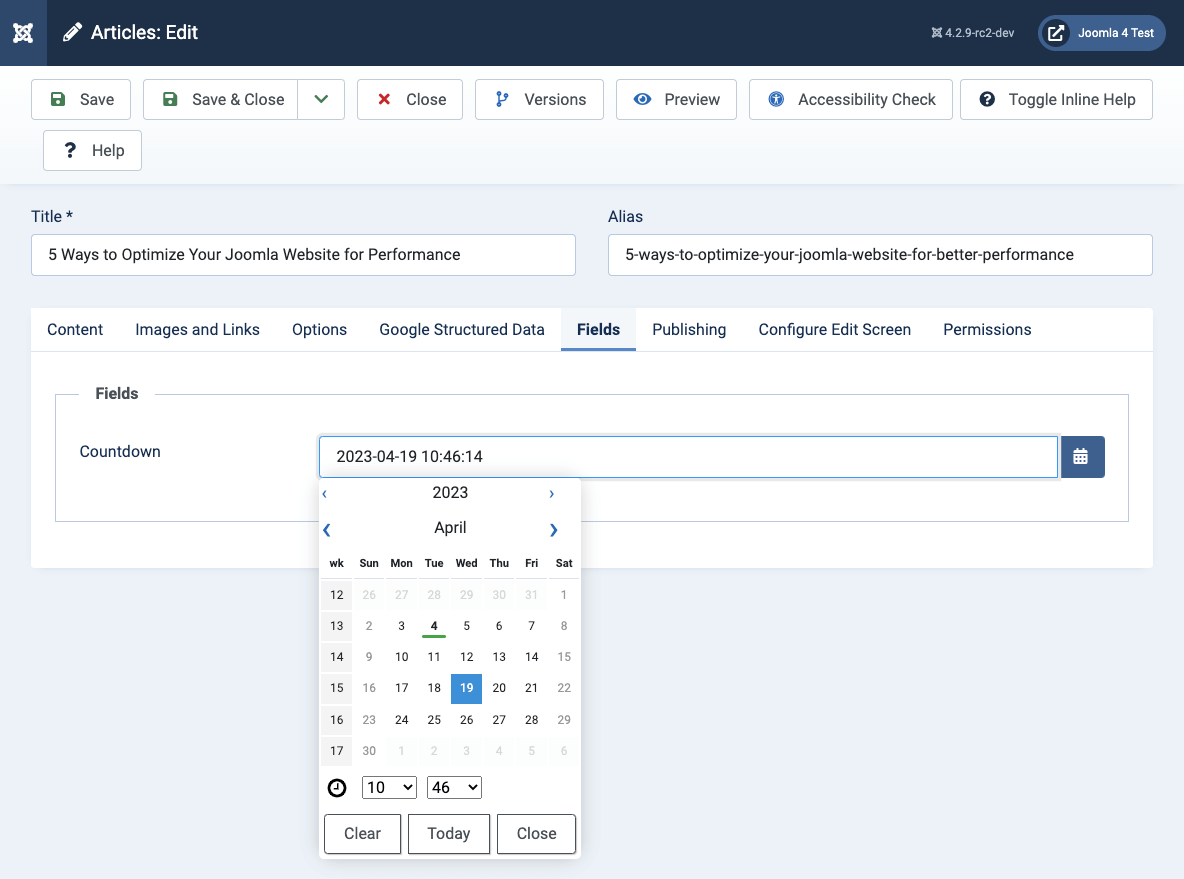
Step 6: Select the Countdown Date in the Joomla Article
Now that we have our Countdown field properly configured, we should see it on the article's editing page. Head over to Joomla Content and click to edit the article you want to add a countdown timer to. In most cases, the Countdown Field should be in the Fields tab. Once there, click the Calendar icon and select a future date.
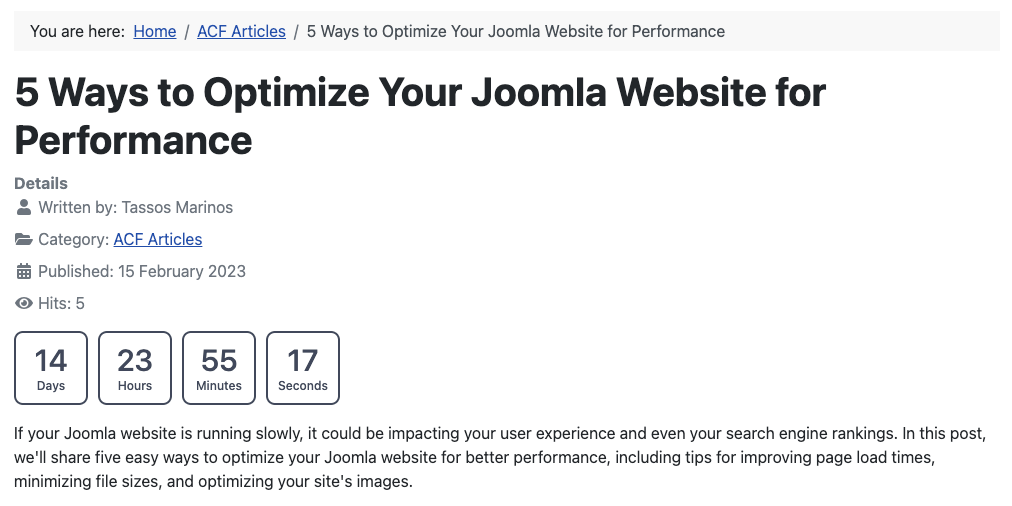
You’re now done! Once you’ve finished setting your countdown timer's date, save the article and go to your front end to enjoy your countdown.
Note: You can read more below for advanced settings awaiting for you to fine-tune your countdown as per your needs.
The Countdown Field Settings
Below, you can find a list of the available options of the Countdown Field.
| Name | Description |
|---|---|
| Show Advanced Settings | By default, the Countdown field will display only settings related to appearance, such as colors. However, you can toggle between showing all settings and appearance settings. |
| Timer | |
| Type | The type of the countdown. This can either be static or evergreen. Fixed Date: The default countdowns that require a fixed date to countdown to. Evergreen: This countdown requires a set of days/hours/minutes/seconds to countdown to. Each user that views the countdown will see the same countdown. |
| Date Timezone | The timezone that will be used in the countdown. Use Joomla Timezone: The given date will be transformed to UTC and then the server (site's) timezone will be applied to it. Use Visitor's Timezone: The given date will automatically be adjusted to the client's (user's) timezone. Note: This will only work for countdown with Fixed Date type. |
| On Countdown Expire | What action should the countdown perform upon ending? Available values are: keep, hide, restart, message, and redirect No Action: Let the countdown appear with zeroes upon ending. Hide timer: Hide the countdown timer once it ends. Show Message: Show a message once the countdown timer ends. Redirect to URL: Redirect to a URL when the countdown timer ends. Note: When "Evergreen" type is selected, the countdown will always restart when it ends. |
| Show Message | Enter the text that will appear when the countdown ends and On Countdown Expire is set to Show Message. |
| Redirect to URL | Enter the URL where the user will be redirected to when the countdown ends and On Countdown Expire is set to Redirect to URL. |
| Template Selector | |
| Type | Select whether to use a pre-defined countdown template or use a custom format. |
| Template | The template consists of 8 pre-dfined templates that you can choose from. |
| Custom Format | Using the Custom Format, you can write your own HTML as well as use the following Smart Tags:
|
| Unit Display | |
| Days | Set whether to display the days. |
| Days Label | Set the days label. |
| Hours | Set whether to display the hours. |
| Hours Label | Set the hours label. |
| Minutes | Set whether to display the minutes. |
| Minutes Label | Set the minutes label. |
| Seconds | Set whether to display the seconds. |
| Seconds Label | Set the seconds label. |
| Enable Separator | Set whether to include a separator between the countdown items. |
| Enable 00 Number Format | Set whether to display numbers in 0 or 00 format. |
| Unit Item | |
| Item Size | Set width and height of each countdown item. |
| Gap | Set the gap between countdown items. |
| Item Padding | Set the padding for each countdown item. |
| Background Color | Set background color of each countdown item. |
| Border | Set border of each countdown item. |
| Border Radius | Set border radius of each countdown item. |
| Unit Digits Container | |
| Padding | Set digits wrapper padding in each countdown item. |
| Border Radius | Set digits wrapper border radius in each countdown item. |
| Background Color | Set digits wrapper background color in each countdown item. |
| Digits Container Custom Width | Set digits wrapper minimum width in each countdown item. |
| Unit Digit | |
| Font Size | Set each digit font size. |
| Font Weight | Set each digit font weight. |
| Padding | Set each digit padding. |
| Border Radius | Set each digit border radius. |
| Gap | Set the gap between the digits. |
| Background Color | Set each digit background color. |
| Text Color | Set each digit text color. |
| Digits Custom Width | Set each digit minimum width. |
| Unit Label | |
| Font Size | Set label font size. |
| Font Weight | Set label font weight. |
| Space between label and digits | Set label margin top. |
| Text Color | Set label text color. |
Countdown Field Previewer
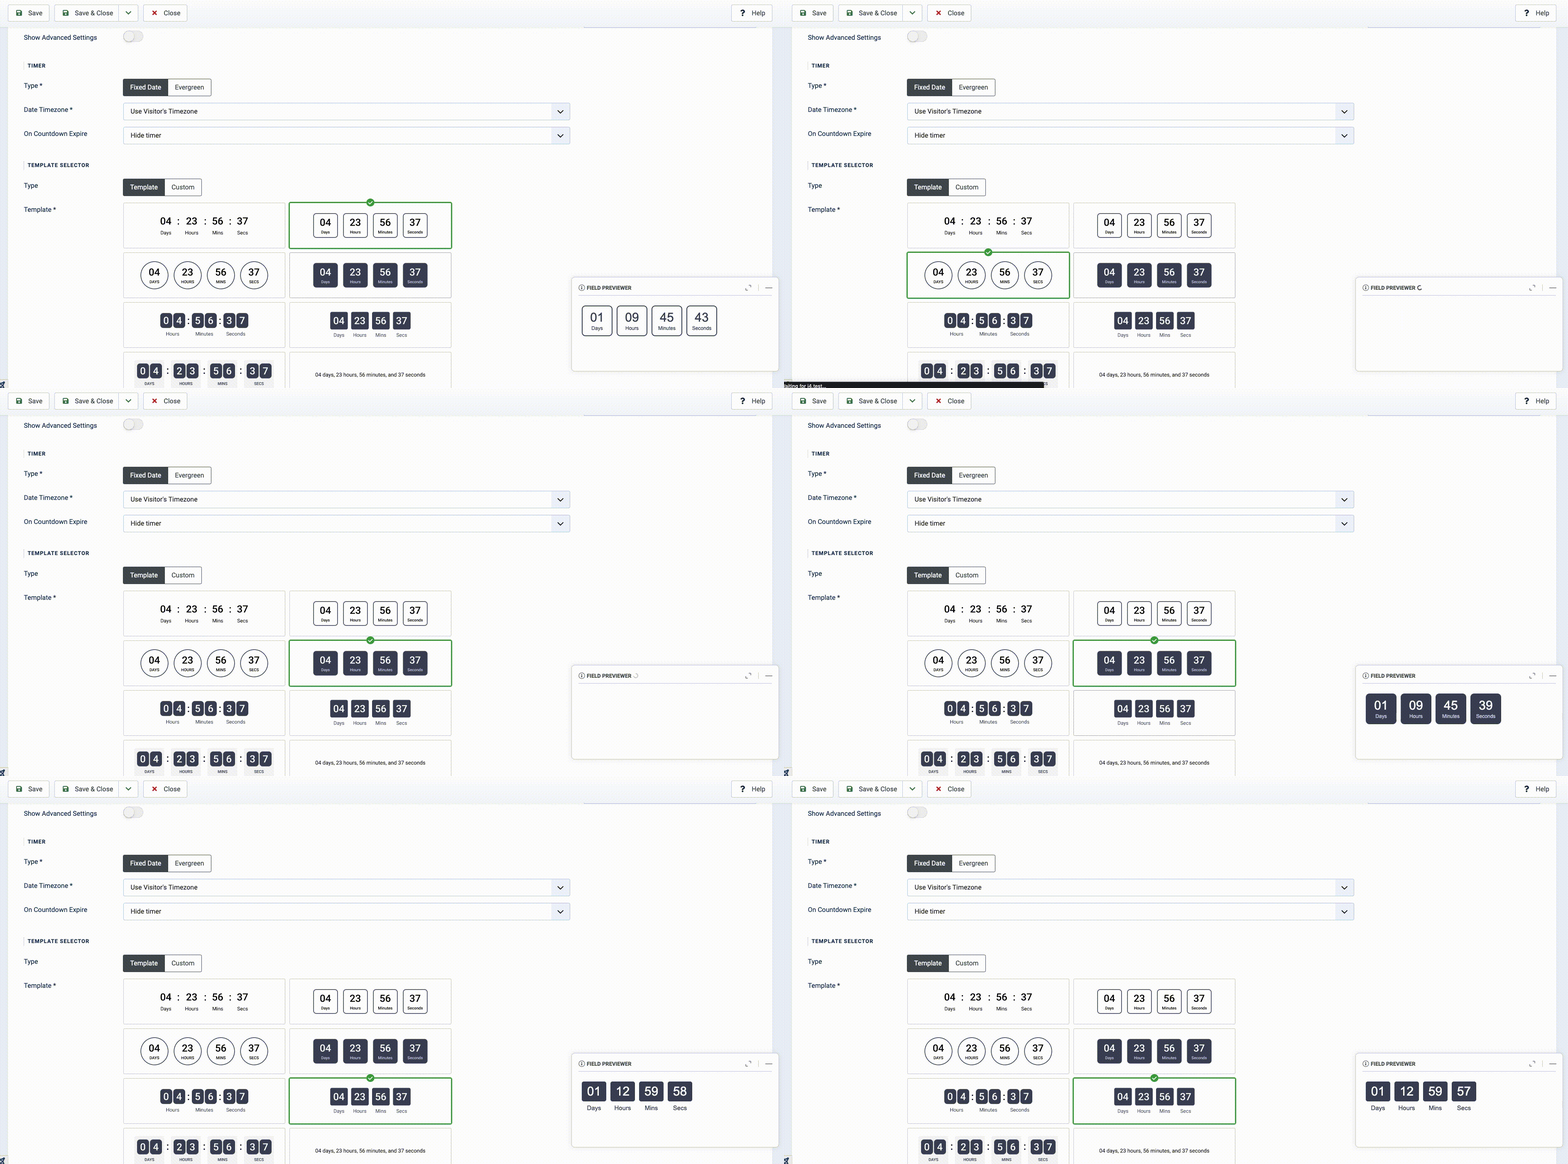
The Countdown Field provides a built-in previewer so you can see how the countdown timer will look on your front-end without having to hit save, go to the front end, refresh the page, view the countdown timer, go back to the settings page, edit it and repeat.
On the bottom right of the Countdown field settings, you will notice the Previewer which will automatically update whenever you make changes to field settings.
The previewer can be minimized, or even maximized, where you can toggle between the desktop, tablet, and mobile devices so you can see how your countdown will look like across different devices.




 Rated: