- Getting Started
- Schema Types
- Integrations
- Developers
-
Troubleshooting
- Troubleshoot Structured Data not Generated on the Page
- Preview button not showing on Structured Data Testing Tool
- I am seeing the "is not a known valid target type for the identifier property" error
- Fixing Error decoding JSON data in Joomla Articles
- Fix missing Google Structured Data tab in the Article Editing Page
- Remove Faulty Microdata
- Troubleshoot Structured Data not Showing in Search Results
- Functionality
Add Structured Data to Menu Manager
The Menu Manager Integration gives you the ability to assign any Content Type (e.g. Article, Product, etc) to any of your existing Menu Items except the External URL Type and the Menu Alias Type.
When to use it
There are two main reasons why the Menu Manager Integration is exactly what you should be using and those are the following.
Pages consisted entirely by modules
There are scenarios where your page is 100% created by modules and therefore there is no component behind them to provide a traditional scenario for one of the other integrations.
Add Structured Data to yet unsupported extensions
Since the integration list is still growing with a long list of extensions waiting to be integrated, you can bridge the gap between now and the day your integration will be ready by using the Menu Items which could be created by your particular extension. Surely, for some this will be proven enough to not even have to wait for a special integration!
How to Enable the Menu Manager Integration
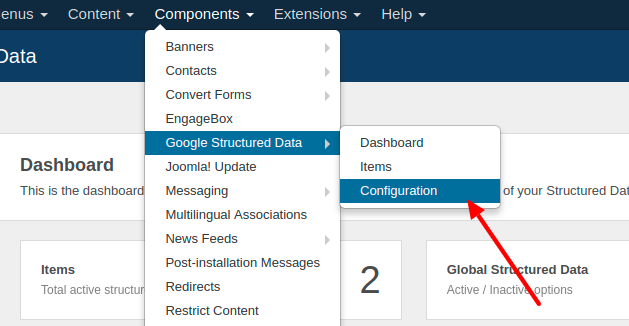
As with all of the integrations, you need to navigate to Components > Google Structured Data > Configuration
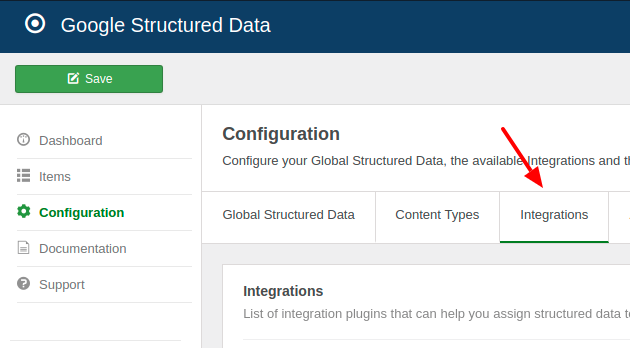
Then, click the "Integrations" Tab where all the Integrations are listed.
Find the Menu Manager Integration in the list below and make sure that you enable it by clicking the button where the arrow is pointing in the screenshot below so that it changes to a green checkmark.

How to assign a Content Type to a Menu
There are two methods to assign a Content Type to a Menu.
Via The Fast Edit Method
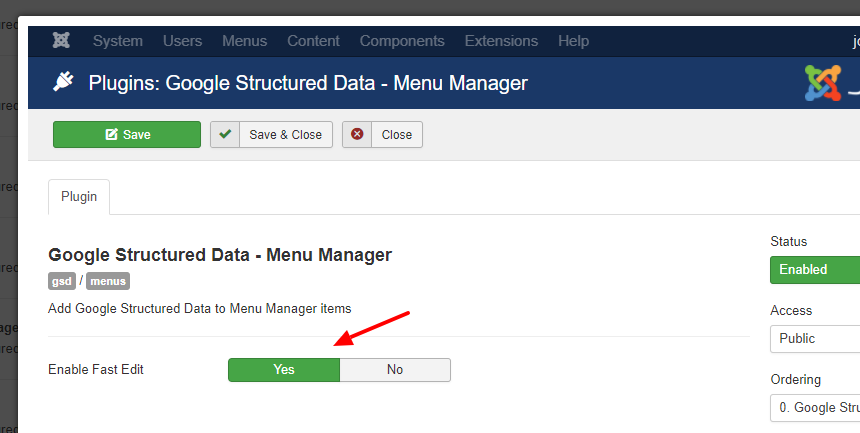
Before you start using the Fast Edit Method you need to enable it from within the integration. To do that, click on the Integration's Options Button and choose "Yes" for the Fast Edit option as shown in the screenshot below.
Now that the Fast Edit method is enabled you have the ability to directly assign a Content Type to a Menu Item via the Menu Item Edit Screen as shown in the screenshot below.
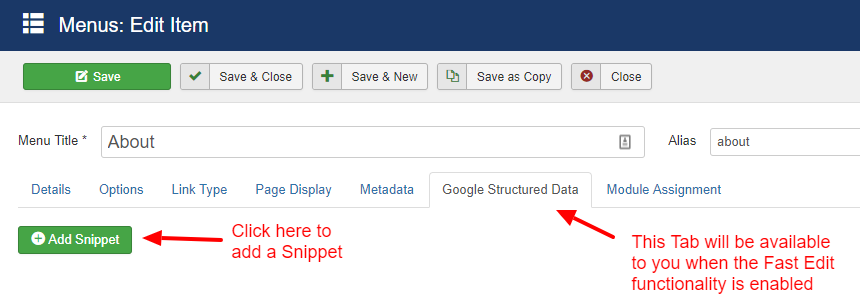
Once you click the "Add Snippet" button, you will be greeted by a popup containing the form to choose and fill out your Content Type. You'll also notice that the Menu Item will already be pre-selected for you.
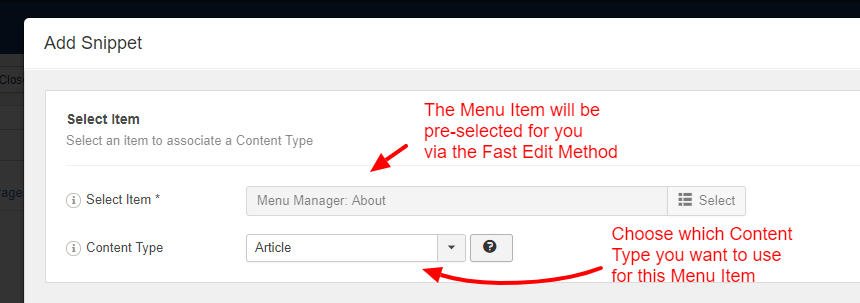
Via the Component's Items Manager
This is the traditional method which can be followed for all the integrations. Just navigate to Components > Google Structured Data > Items and click the "New" Button as shown in the screenshot below.
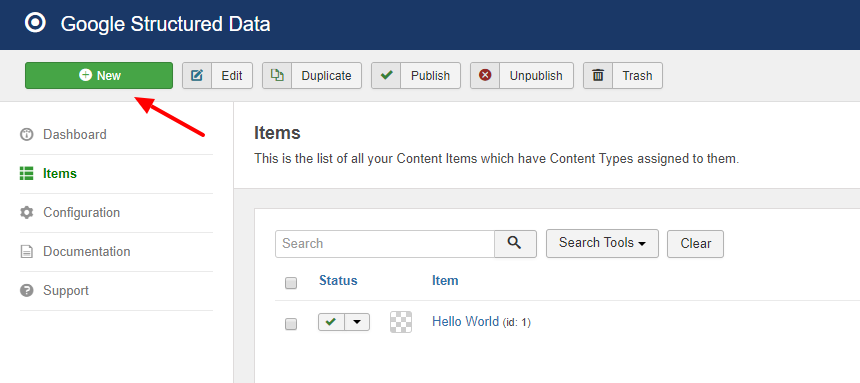
Then click the "Select" button.

Finally, in the popup that will be displayed, choose the "Menu Manager" option as shown in the screenshot below to get all of your Menu Item and pick the one of your choosing.

Differences for Content Types between other Integrations
Due to the special nature of this Integration, some distinct differences are in place in terms of defaults and available options.
For all the Content Types the defaults for the following fields are different.
- Headline: This field's default value is the "Browser Page Title" in the Menu Item's Page Display Tab. If that's not available then the Menu Title is used instead.
- Description: This field's default is the "Metadata Description" in the Menu Item's Metadata Tab.
- Image: This field's default is the "Link Image" in the Menu Item's Link Type Tab
Also, the "Inherit" option for the Rating field is not available in this integration as there are no rating which can be retrieved by just the Menu Item. Therefore, you can only use the Custom Option or the Disabled Option.
Furthermore, the same can be said about the "Inherit" Option for the Author field since the Author can not be retrieved by a Menu Item alone.

Important Notes
- The only Menu Item Types which can not be accompanied with Structured Data is naturally the External URL Type and the Menu Alias Type.
- It's important to remember not to use the Rating option for your Home Menu Item because Google issues warnings which turn into penalties for "Spammy Structured Data".


 Rated: