-
- Tracking Form Lead Source
- Show a Form Only to Logged-In Users
- How to Increment a Count on Each Form Submission
- Adding an “Other” Option
- Adding a Unique ID to Each Form Submission
- Show or Hide Form Fields Based on User Joomla User Group
- Disabling Browser Autocomplete for Form Fields
- Scroll the Page to the Top When a Long Form is Submitted
- Display Submissions Count for a Specific Form
- Populate Drop Down, Radio Buttons or Checkboxes with a CSV File
- Automatically Delete Submissions Older Than X Days
- Silently POST Submitted Data to Any API or URL
- Automatically Save Each Submission to a JSON file
- Create a Custom Login Form
- Auto-Populate Fields with Article Data
- Add a placeholder text to a Dropdown field
- Create Multilingual Forms in Joomla
- Redirect User to a URL After Form Submission
- Importing and Exporting Forms
- Exporting Form Submissions
- Display Convert Forms in a popup
-
- How to Create a Quiz Form
- Show Confirmation Popup After Submission
- Using the Conditional Content Shortcode in Convert Forms
- Copy Value From One Field to Another
- Submission Tasks
- Exporting Form Submissions with a Webhook URL
- Conditional Fields
- PDF Generator
- Input Masking
- Calculations
- Populate Fields Using Query String
- Smart Tags
-
- Minimum Time to Submit
- Restrict Form Submissions Based on IP
- Enforcing a Custom Password Policy in Convert Forms
- Add Cloudflare Turnstile to your Joomla Form
- Implement the Iubenda Consent Database in Joomla with Convert Forms
- Add Custom Validations to Fields and Forms
- Add Math Captcha to your Form
- Prevent a Field From Saving in the Database
- Add hCaptcha to your Form
- Enable Double Opt-in
- Allow Form Submissions in Specific Date Range
- Ensure a Unique Value is Entered Into a Field
- Block Form Submissions Containing Profanity (Bad Words)
- Block Email Addresses or Email Domains
- Honeypot
- Setting Up Google reCAPTCHA
- Create GDPR Compliant Forms
Confirmation Field
Add confirmation fields for sensitive inputs like email or password to ensure accuracy.

Confirmation fields makes it easy to require a user to verify their email address, password or any other field of your choice. Below you can find a guide explaining how to set it up for the Email Address Field as well as the Password Field.
How to add a Confirmation field
To add a Confirmation field follow the steps below:
- First, create or edit a form
- Go to Fields > Add Field
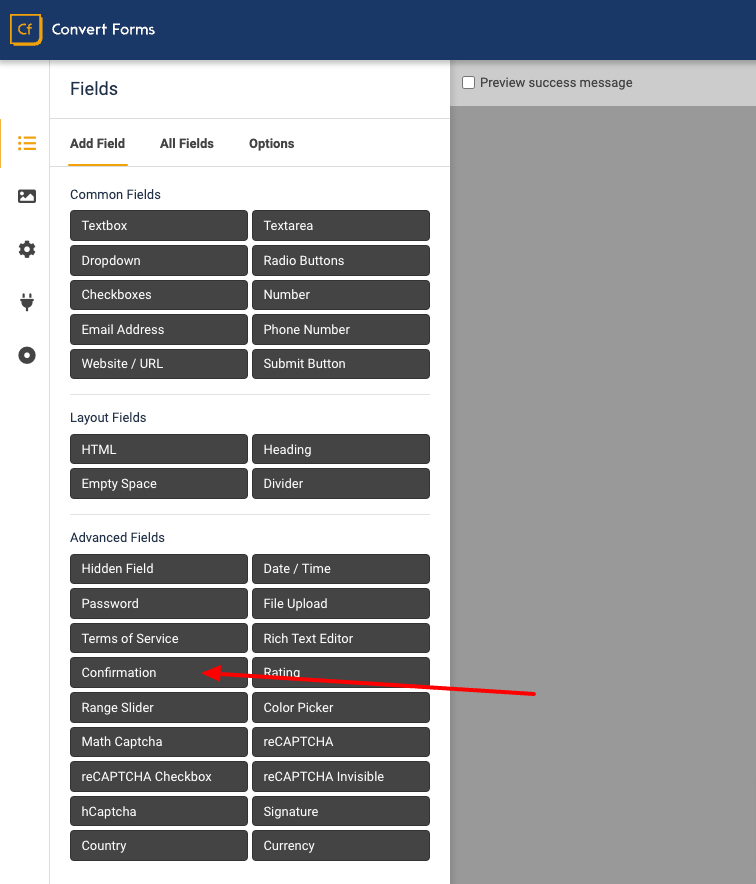
- Select the Confirm Field from the Advanced Fields
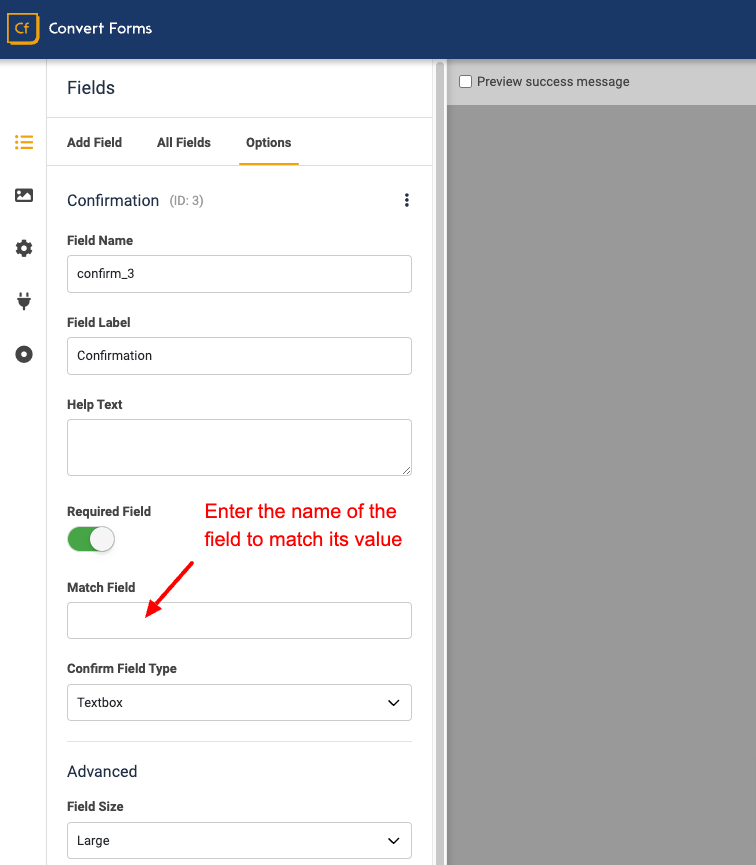
- Add the Field Key from the field you want to confirm its value to the **Confirm Field Key
- Select the Confirm field type via the **Confirm Field Type select box. Your Confirm field can either be set to display plain text or asterisks for password confirmation.
How to create an Email Address confirmation
You will need to have an Email Address Field in your form. If you do not have any, you can add via the Fields > Add Field page.
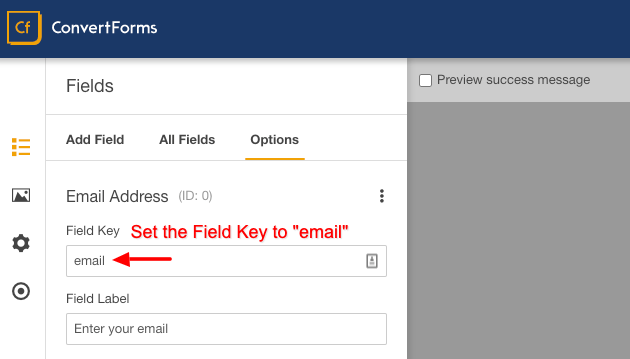
Once you have added the Email Address Field, make sure the Field Key is set to email.
Now you can add the Confirm Field via the Fields > Add Field page. After you have added the Confirm field, you will need to set the Confirm Field Key to confirm_email and make sure the Confirm Field Type is set to Textbox.
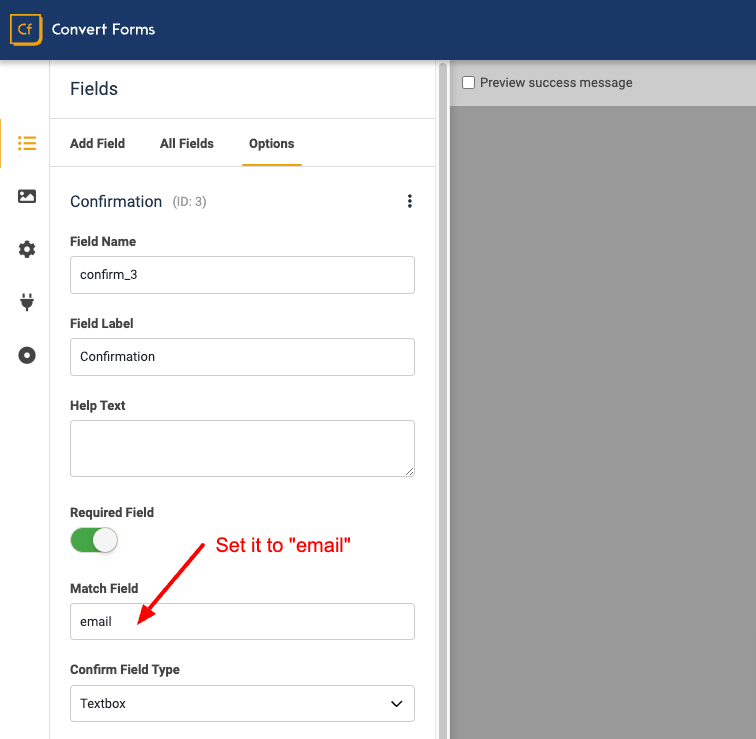
Your users will now need to enter their email address twice to verify their email addresses match.
How to create a Password confirmation
You will need to have an Password Field in your form. If you do not have any, you can add via the Fields > Add Field page.
Once you have added the Password Field, make sure the Field Key is set to password.
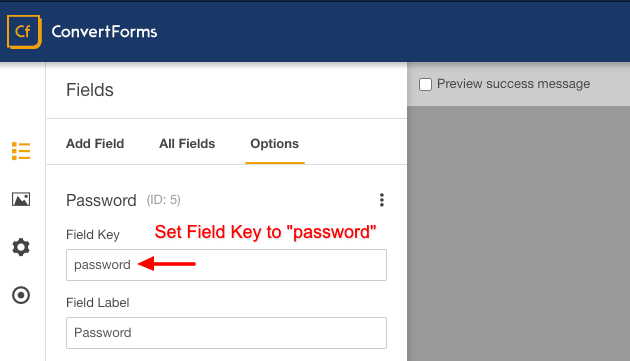
Now you can add the Confirm Field via the Fields > Add Field page. After you have added the Confirm field, you will need to set the Confirm Field Key to confirm_password and make sure the Confirm Field Type is set to Password.
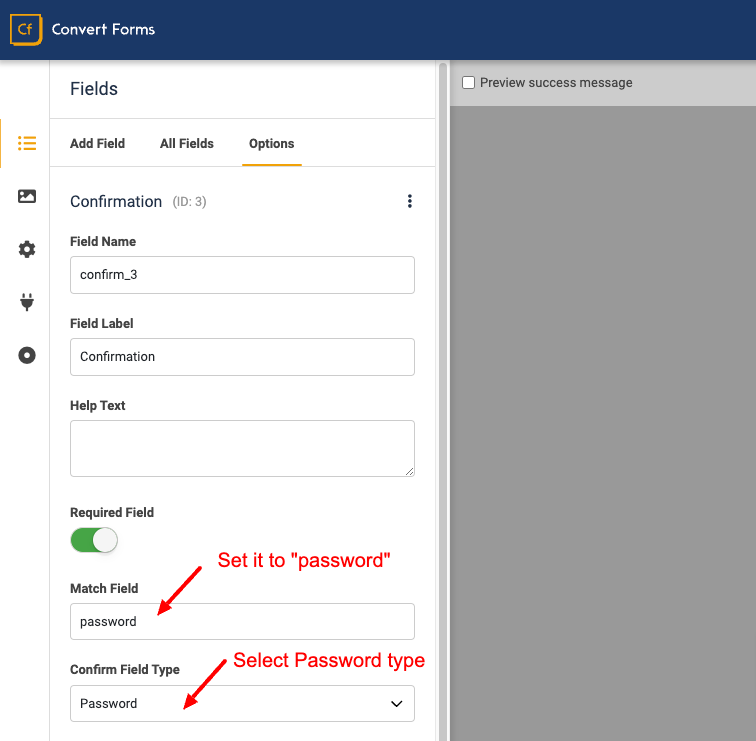
Your users will now need to enter their password twice to verify their passwords match.


 Rated: